The GitHub repo for this project is available at: https://github.com/sjmf/ch9329-keyboard
I’ve been working with Raspberry Pi hardware for a while. Part of my PhD research relied on embedded devices I made using Pi Zeros, and during my undergraduate research (over a decade ago now!), using the original Pi model A, I discovered why running a MySQL database on a Pi’s SD card was a bad idea…
Something that’s always bugged me working with these embedded computers is having to carry around an external keyboard and monitor, especially before setting anything up like WiFi or SSH access. I recently helped to run a hackathon at RSECon’23 as part of the Carpentries Offline project, and it very quickly became clear that carrying around lots of extra hardware to work with Pis (and other brands of embedded computer) is unwieldy, unreliable, and can totally take the joy out of hacking with them.
But, pretty much everyone there brought a laptop with them.
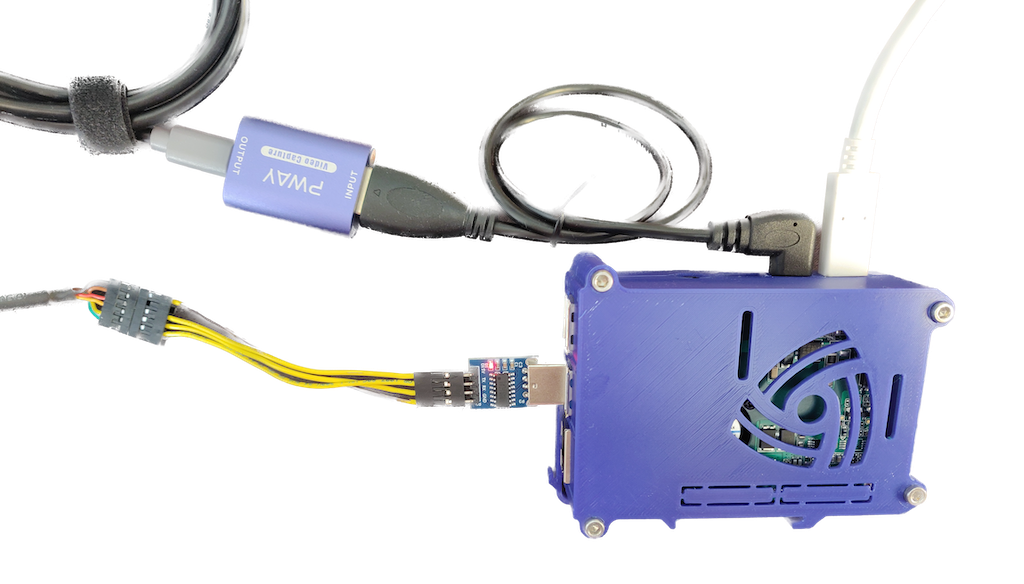
Viewing the video output from the Pi on a laptop
A few years ago, I bought a really cheap USB HDMI video capture card. I don’t have any specific brand recommendations but eBay lists a whole lot of them for under £20. The latency isn’t great, but for working in a terminal it’s not a deal-breaker. The better brand of capture card you get, the latency will go down and the reliability up, but prices can become steep incredibly quickly. For getting started, a cheap one is all you need.
These show up as a webcam under your operating system and can be displayed using something like VLC:
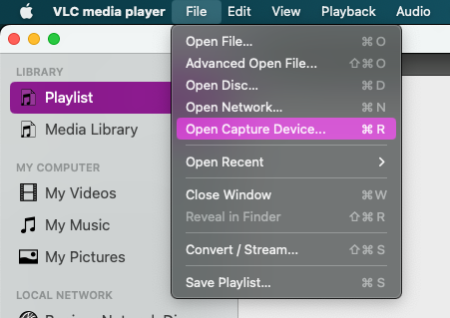
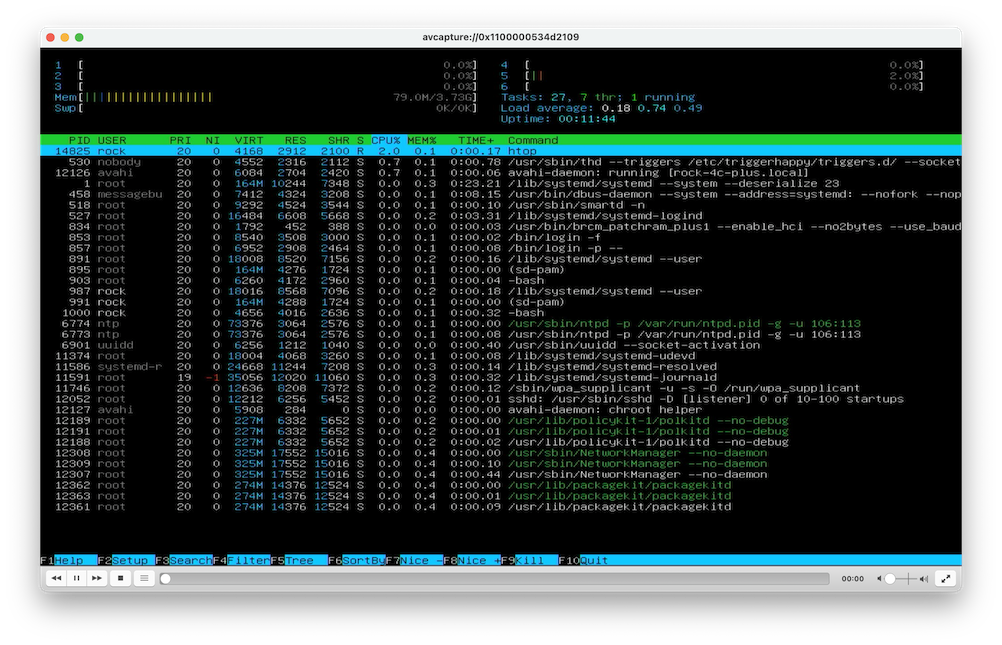
Voila! You have a video feed from the Pi on your laptop.
But, I thought: how can I control it without carrying around a keyboard? I already have one of those built into my laptop… surely there’s a way to use that?
Emulating a USB HID Keyboard
The solution I settled on for sending input to the Pi was to emulate a USB keyboard. I played around with a couple of different solutions (including trying to bit-bang USB HID over GPIO with an ESP8266) before I found the CH9329 UART to HID Keyboard/Mouse Controller. Devices using this chip can be had for less than £5 from eBay and AliExpress: at one end it presents a USB HID Keyboard, at the other, it exposes a UART serial connection to take in packet-formatted data over serial.
I wasn’t able to find any documentation in English on the CH9329 protocol, but I did find a PyPi library written in Chinese which implements it, and was MIT-licensed. I Google-translated and stripped down the library to the part which implements the packet format, encapsulation, and checksums to speak the CH9329 protocol. I now had a basis to write a Python script to do what I needed: record keystrokes on my laptop, and send them over serial to the emulated USB keyboard connected to the Pi.
I’ve pushed my implementation up to my GitHub at sjmf/ch9329-keyboard so that anyone can download and use it.
Capturing keystrokes
It turns out there are a few different ways to capture keystrokes from the local computer. In a way, the implementation is very much like writing a keylogger: you’re looking for a way to capture keyboard input and handle it separately to how the OS normally would.
Using a handy StackOverflow post, I settled on a shortlist of four python libraries which offer different affordances for capturing keystrokes. Some require elevated permissions, or even to run as root. Some enable features like pasting in data. Here’s a comparison table:
| Mode | Modifiers | Paste | Blocking | Focus | Permissions |
|---|---|---|---|---|---|
usb |
✅ Yes | ❌ No | ✅ Yes | ❌ No | sudo / root |
tty |
❌ No | ✅ Yes | ❌ No | ✅ Yes | Standard user |
pynput |
✅ Yes | ❌ No | ❌ No | ❌ No | Input monitoring (OSX) |
curses |
⚠️ Some | ✅ Yes | ❌ No | ✅ Yes | Standard user |
… and so, I wrote implementations for all of them to see which I liked the most.
Some of these libraries offer very low-level interaction with the keyboard hardware. For example, the pyusb implementation removes control of the keyboard from the OS and hands it to the script. While the script is running with superuser privileges, all keystrokes are blocked from the host OS and its programs (meaning no alt+tabbing to your web-browser!). It just captures scancode packets directly and forwards them to the serial port. Because of this, any arbitrary key combination is supported, but features like ‘paste’ are not: the Ctrl+V key combination would be forwarded to the hardware at the other end, bypassing the OS paste function!
Other implementations are more gentle: the curses implementation for example allows the user to paste in data to the terminal to send it to the remote device, and supports useful keyboard shortcuts such as Ctrl+C, which interrupts a running command. I had to write code to handle shortcuts manually, because of the way curses reports these characters to the script. It requires the terminal to be focused to pass input to the serial connection, but will run with a standard user’s permissions. In the end, I chose curses as the default implementation: it supports a good mix of functionality while allowing convenience features such as ‘paste’, and doesn’t require any elevated privileges on the host to run.
Although capturing keys is one thing, the goal of the script is to register these keystrokes and turn them into keyboard scancodes to send over the serial connection. Some input methods return scancodes directly (pyusb), but others return ASCII characters (tty), strings (curses), or enum values (pynput)! This necessitates converting characters from the various library-dependent representations to keyboard scancodes.
Each key has an integer value associated with it (usually presented in hexdecimal: 1E = A, 1F = S, etc), which are different to the ASCII codes for those characters. I wrote a few convenience functions for converting between different data types using lookup tables. I’m not certain that my implementation is going to account for every possible key, and I can only test UK-ISO keyboard layouts (as that’s all I own), but so far in testing it’s held up pretty well! And because there are multiple implementation methods, if one isn’t working for what the user is trying to do, they can try another with the command line switch.
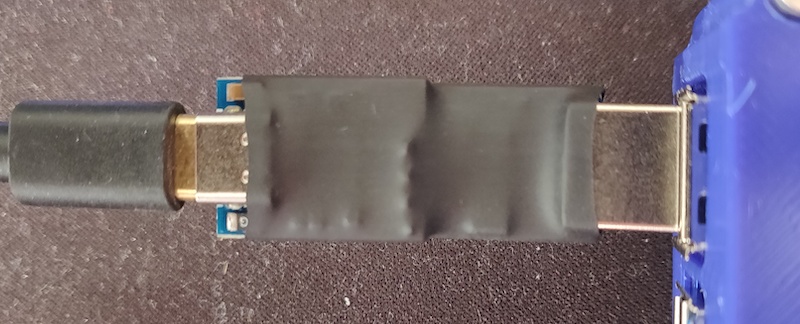
Miniaturisation
But I want to to go smaller! Instead of using a full-size FTDI cable, I found a miniature USB-C UART module, which could be soldered directly to the CH9329 module on header pins.
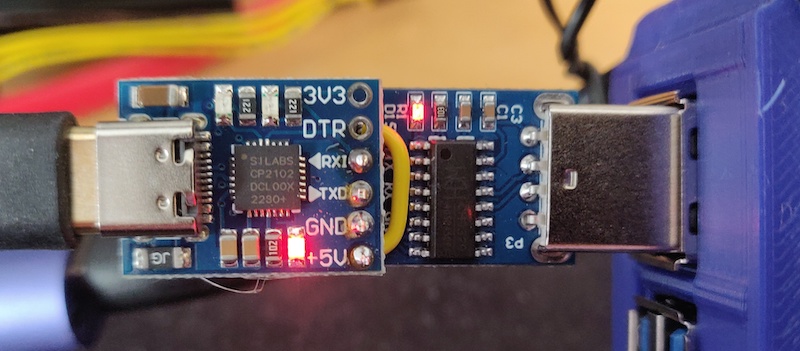
Incredibly, all three required pins lined up (TX to RX, RX to TX and GND to GND). Both modules also expose a 5V rail, which must not be connected together: the power supplies to the two modules must be kept isolated from each other. I actually did run a wire between the 5V rails on the modules (yellow in the image), but thankfully remembered in time that backfeeding 5V into a laptop is a BAD idea and disconnected it again before any damage was done to either device.
Finally, with a bit of heatshrink tubing over the outside, I have a device that I can put in my pocket and take to hackathons.
How does this compare to other solutions?
I believe this is the cheapest possible solution to this problem, although it’s not feature-complete. All the required hardware (excluding a laptop) can be had for under £20 at time of writing. The shopping list looks like this (all prices inclusive of postage at current eBay rates):
- HDMI to USB video capture device (~ £10 and up)
- CH9329-based Serial UART to USB HID keyboard module (£6)
- A serial cable or module (such as an FTDI cable) (£3.60 and up)
The CH9329 modules on offer on eBay do require soldering a 4-pin header. If you don’t have the tools needed for this, ask around! It’s likely you’ll be able to find someone who does, especially if you work in the tech sector or a university. Or find your local makerspace or hackspace, and there’ll almost certainly be someone who’s interested in your project!
The standard way I would normally interact with a Pi would be over SSH. However, this can require some set-up: starting from a newly flashed OS image, connecting to local WiFi networks and enabling the SSH daemon usually requires a keyboard and monitor. With enterprise WiFi networks, or networks with AP-isolation turned on, connecting to WiFi may still not let you SSH in. But, if this solution is useful just to bootstrap getting hooked up to a network and enabling SSH, then it has served its purpose!
Another way of getting a terminal on a Pi from another machine would be to use the serial terminal over the in-built GPIO pins. But again, this is not enabled by default, and may also present some weirdness when handling special characters. If you’ve just flashed an image, you will still need to perform setup steps (enabling Serial in raspi-config), just as for SSH.
Professional-grade solutions such as KVM hardware (e.g. PiKVM or the various StarTech offerings) can run into the hundreds of pounds (think £200 to £800), and may not even support HDMI. While they expose a few more features, such as the ability to drag and drop files onto a USB mass storage drive, for most Pi users this will be way beyond the price range that they’re willing to commit to.
For the hobbyist or average Pi hacker, I’d like to think that this is a pretty good solution. Please do download the python script if you think this might be useful for you. I’ve had fun writing it!